Jhaal Muri in Canape


20140827_212036 20140827_211810


Just like bhel is to mumbai, so is Jhaal Muri to Kolkata.This simple yet delicious snack can be put together in minutes and features typical Bengali ingredients like mustard oil.Jhal Muri is a delicious crunchy snack found in almost every street corner of Kolkata. The flavors of this delectable snack is from the special  Masala and Mustard Oil that is so closely associated with the vendors. The Jhaal Muri is simple and quick to make, very similar to the Mumbai Bhel, without the chutneys and sev imparting strong flavors from the mustard oil. But i am going to serve it in different way 😛

It is soo quick and easy to make.Let’s start with the recipe. 🙂


Ingredients:
1 cup puffed rice (“Muri”)
1/4 cup chickpea flour noodles (” Sev”)
1/4 cup fried lentils (” Channa Dal”)
1/4 cup roasted peanuts with skin, crushed
1/2 cup mung bean sprouts
1/4 cup fresh cilantro, chopped
1/4 cup fresh coriander leaves, chopped
1 tablespoon fresh coconut meat, chopped
1 tablespoon fresh ginger root, chopped
1 tomato, chopped
1/2 medium cucumber, chopped
1/4 mild onion, chopped
1 tablespoon tamarind sauce
2 teaspoons fresh lime juice
1/2 teaspoon mustard oil
Pinch chaat masala
Pinch amchoor powder
Pinch of jeera powder
Pinch of red chilli flakes (optional)
2-3 chopped green chillies
Pomegranate seeds for garnishing

Direction:
Combine the puffed rice, chickpea flour noodles, fried lentils and peanuts in a large bowl. Stir in the mung bean sprouts, cilantro, coriander leaves, coconut, ginger, tomato, cucumber and onions to combine. Add the tamarind sauce, lime juice, mustard oil, chaat masala and amchoor powder, chopped chilli,  chilli flakes,  jeera powder and mix well.
Now place this mixture into canape and Garnish it with coriander leaves, sev and pomegranate seeds.

Serve immediately and enjoy the spicy flavour of this Jhaal Muri in Canape. 🙂

Try it and let me know your feedback… 🙂

Malai Kofta


20140827_184204 20140827_184109


Malai Kofta is a classic North Indian dish originated from the Mughlai cuisine. Malai refers to the cream and  koftas are deep fried paneer and vegetable dumplings in rich and creamy tomato gravy.With malai kofta, it is always celebration time! this is one dish which nobody will get bored of even if it is served at every party. The koftas themselves are so tasty that they can easily be served as a snack along with tea. You could microwave or shallow fry the koftas if you want to avoid deep frying them.It is a rich dish perfect for parties and special occasions. It goes well with chapati, naan, jeera rice, all pulaos and parathas. 

Prep time -20 mins
Cook time – 20 mins
Serves – 4

Ingredients:
For kofta:

Potato -2 or 1/2 cup boiled and mashed
Mixed vegetables – 1/2 cup (carrot, beans,peas)
Paneer/ cottage cheese – 1/2 cup

Green chillies -1 finely chopped
Coriander powder -2 tsp
Cumin powder -1 tsp
Red chilli powder -3/4 tsp
Cashew nuts -1 tbsp (finely chopped)
Coriander leaves – 2 tbsp finely chopped
Grated Ginger- 1/4 tsp
Cornflour – 3/4 tsp
Salt as needed

Cornflour for rolling the koftas
Oil for frying koftas

Ingredients needed for the sauce:

Oil -1 tbsp
Onion -1 big
Ginger-garlic paste -1 tsp
Tomatoes -3
Turmeric powder -1/4 tsp
Cumin powder/jeera powder -1 tsp
Coriander powder – 2tsp
Red chilli powder – 3/4 tsp
Poppy seeds- 1 tbsp
Garam masala- 1/4 tsp
Yogurt – 1/2 cup
Milk- 1/2 cup
Cream- 1 cup ( half cup for gravy and half for serving)
Salt as needed
Cashew nut – socked in water and chopped-1 tbsp

For the seasoning:

Oil – 1 tbsp
Shah jeera/Caraway Seeds -3/4 tsp

For Garnishing:

Coriender leaves and cream

Preparation:

Boil vegetables or pressure cook vegetables for 2 whistles. I kept beans, carrot and peas in a vessel without water, closed it with a lid and kept potatoes on top and pressure cooked for 2 whistles. In this method there is less moisture in the vegetables. (Don’t forget to add water in the pressure cooker).Whichever method you follow, put the vegetables in a muslin cloth and squeeze out all excess water. You can use that water for the gravy later. Drain the water from the potatoes immediately after cooking.Grate paneer and keep it ready.

Method:

For Koftas:

1.In a bowl, mix together grated paneer, mashed potatoes, vegetables, finely chopped green chillies, coriander powder, chilli powder, cumin powder, finely chopped coriander leaves, chopped nuts, 3/4 tsp cornflour and salt needed. Mix well.
2.Divide the mixture equally and make balls.
3.Roll the balls in cornflour. This is done to absorb any moisture left.
4.Heat oil and fry the koftas in batches in medium heat until golden brown.
5.Remove from oil and drain them on a paper towel. Now the koftas are ready. Keep it aside.

For gravy:

1.Now we will prepare the sauce.
Heat a tbsp of oil, fry chopped onions until golden brown. Add salt to speed up the process. Saute continuously for even browning.
2.Add ginger garlic paste and saute for a few more minutes.
3.Add chopped tomatoes, turmeric powder, red chilli powder, coriander powder, poppy seeds, cashewnut,cumin powder and  yoghurt. 
4. Cook until tomatoes become mushy. Do not add water. If it is too dry, add just 1 or 2 tbsp of water. Allow it to cool. Add salt required. (remember we already added salt to the onions)
5.Once it cools, blend it to a fine paste.
6.Now heat oil in a wok again, add shah jeera, when it splutters, add the ground paste and cook for a few minutes.
7.Add milk,cream, little water and bring it to boil in low flame.
8.Add the koftas gently and switch off the flame.(add koftas only at the time of serving)
9.Put some cream on it and finely chopped coriander leaves.Serve hot with laccha paratha and enjoy!!! 🙂

Have a nice day!!! 🙂


Creamy Palak Paneer

20140827_184411 20140827_184256


Palak Paneer is one of the most popular dishes in Indian restaurants worldwide and is commonly served in buffets. This Indian dish is made with spinach, paneer (an acid-set, young cheese), and a combination of spices. This combination of spinach and paneer is not only highly nutritious, but is a splendid blend of taste, texture and flavour. The paneer in this recipe has been fried to add some extra flavour. You can however add the paneer pieces without frying if required.This is the most amazing dish of Paneer and Spinach. but i added some twist into it with Cream and it taste soooooo yummm… so lets start with the quick and simple recipe of Creamy Palak Paneer.

Cooking Time: 10 minutes
Preparation Time: 30 minutes
Serves: 2

Ingredients:

Paneer- 200gm( cut into cubes)
Palak or spinach- 1 bundle(chopped)
Oil -1 tbsp
Onion -1 big
Ginger-garlic paste -1 tsp
Tomatoes -3
Turmeric powder -1/4 tsp
Cumin powder/jeera powder -1 tsp
Coriander powder – 2tsp
Red chilli powder – 3/4 tsp
Poppy seeds- 1 tbsp
Garam masala- 1/4 tsp
Yogurt – 1/2 cup
Milk- 1/2 cup
Cream- 1 cup ( half cup for gravy and half for serving)
Salt as needed
Cashew nut – socked in water and chopped-1 tbsp

Method:

1. Heat a pan and put some oil into it.
Now shallow fry the paneer pieces and keep aside.
2. In the same pan put the chopped spinach leaves and half cook it for 5min. Take it out and keep aside.
3.Now we will prepare the sauce-
Heat a tbsp of oil, fry chopped onions until golden brown. Add salt to speed up the process. Saute continuously for even browning.
4.Add ginger garlic paste and saute for a few more minutes.
5.Add chopped tomatoes, turmeric powder, red chilli powder, coriander powder, poppy seeds, cashew nut,cumin powder and  yoghurt. 
6.Cook until tomatoes become mushy. Do not add water. If it is too dry, add just 1 or 2 tbsp of water. Allow it to cool. Add salt required. (remember we already added salt to the onions)
7.Once it cools, blend it to a fine paste.
8.Now heat oil in a kadai again, add shah jeera, when it splutters, add the ground paste and cook for a few minutes.
9.Add milk,cream, little water and bring it to boil in low flame.
10.Now add spinach and paneer into it and cook it for 1min.

11.Garnish it with coriander leaves and cream.
Serve hot with laccha paratha.

Stuffed Garlic Bread with mozzarella cheese, sweet corns,spicy jalapeños and olives(Domino’s style)


1409035107284 1409035001168

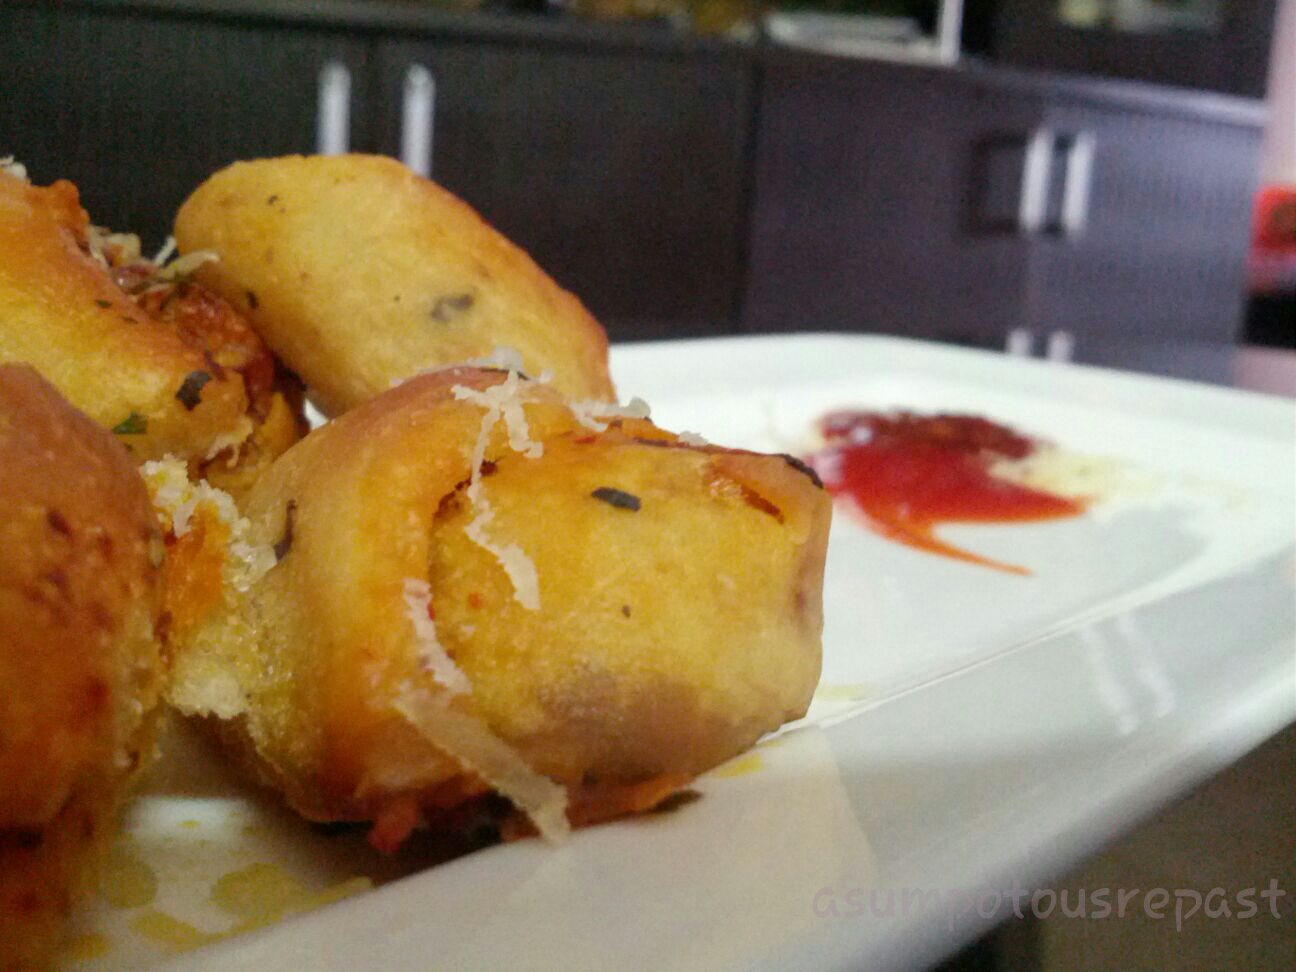
I was thinking what I should make and decided garlic bread might be a good option to try. I suddenly remembered Garlic Bread sticks from Domino’s. Ever since I started eating Pizzas from Domino’s, their bread sticks have become a frequent one as well. Their garlic breadsticks are amazing, much better than Pizza Hut Garlic bread. Though in terms of one trying to replicate at home, Pizza Hut’s Garlic Bread is a breeze, while Domino’s surely packed a punch.This bread when it turned out softer and so delicious I was over the moon!  I had stuffed cheese in the center, with loads of olive oil, corns and jalapenos and the oregano spice mix over the entire bread.The Stuffed Cheesy Breads looked like big calzones with garlic and cheese seasoning on top. 😉  So just take a look at the recipe written below and make the tasty & delicious Stuffed Garlic Bread at home.I must say its a complete sinful combo. So let’s start the recipe… 🙂

INGREDIENTS:

For Dough
2 cup  all purpose flour
1 Tsp active dry yeast 
1.5 cup Luke warm water
1 Tbsp. sugar
10-12 cloves of garlic finely chopped (mid-size)
4 Tbsp. olive oil (60 gms)
2 Tbsp. butter (30 gms)
1 tsp salt
1 Tbsp. Domino’s seasoning or Oregano Seasoning 

For Garlic Spread:

Garlic cloves – 10 nos (finely chopped), medium size
Unsalted butter – 1/3 cup, at room temperature
Red chilli flakes – 2 teaspoons
Dried spice mix – 2 teaspoons (includes oregano, basil and thyme)
Salt – a pinch

For Stuffing:

Sweet corn – 1/2 cup
Pickled olives and jalapenos – 1/4 cup
Mozzarella cheese – 1 cup, grated or finely chopped

Method( for making Dough):

1) Heat 1/2 cup of water to luke warm temperature. Add active dry yeast and sugar. Beat using a spoon till the yeast dissolves completely.
2) Keep aside untouched for 7-10 minutes to prove. After 7 minutes, you can see the frothy bubbles which means the yeast proved well. If not, throw the yeast and buy new pack to prepare this bread.
3) In a wide mixing bowl, take all purpose flour, finely chopped garlic, domino’s seasonings( you can mix oregano,  rosemary and basil also) and salt. Add proved yeast mixture and a tablespoon of olive oil and butter to it. Mix well.

4) Add water slowly till you get a soft and sticky dough. Knead it in a floored surface till you get soft and slightly sticky dough. Feel free to add more dough to reach the required dough consistency. At the same time, take extra care not make very stiff and dry dough.
5) Coat the dough with the remaining olive oil. Place it in the greased bowl and cover using a cling wrap and keep it aside for 4 to 5 hour or until it doubled in its size. It depends on the place you kept the dough for raising.
6 ) Meanwhile will prepare garlic spread and stuffing.

For Garlic Spread:

1) Take butter in a bowl.
2) Add red chilli flakes and dried spice mix. Mix well.

3) Make a paste of garlic cloves using a mixer. Add this paste to the butter spice mix. Add a very small pinch of salt.

4) Mix well. Now the garlic spread is ready.

For Stuffing:

1) Steam cook the sweetcorn for 5-7 minutes. Alternatively, you can also cook it in the microwave or use the frozen corn.
2) Drain the vinegar and transfer the jalapenos to a bowl.

3) Grate / chop the cheese. Increase of decrease the cheese quantity as per your personal preference. Arrange the bowls in order to make the stuffing easier while preparing the bread.

For Assembling:

1) After 5 hour, The dough should have raised well.
2) Punch back the raised dough. Transfer this to a floured surface. Slightly knead it for 3-5 minutes. The outer surface spring back when you touch the dough towards inside.

3) Sprinkle lots of corn meal (makki atta) on a flat surface (for outer crunchy coating).

4) Roll the dough ball into a circular disc with 12-14CM diameter.
5) Spread a tablespoon or more garlic spread to the disc.

6) Spread the chopped or grated cheese first and then place the pickled jalapenos, sweetcorn and then again top it with cheese. Add more cheese if required.
7) Fold the dough in half and seal the edges carefully. Make sure not to have any opening, otherwise cheese will come out while baking.
8) Transfer the dough to a buttered and seasoned baking tray (Oregano Seasoning)
9) Cut the dough into bread sticks, brush with butter and drizzle a lot of Domino’s Oregano Seasoning.
9) Brush the top of all the breads with remaining garlic spread. Sprinkle dried oregano.
10) Bake it in the microwave for 40 minutes or till the bread becomes golden brown.
11) Remove from the microwave and brush again with garlic spread.
12) Slice and Serve hot with cheesy dip.

And enjoy…. 😉 🙂


Pind Bhaluchi Special- Dahi ke Kabab

Kebabs made from curds? this is a strange concept for most people and it was for us too until we tasted them! these tangy kebabs that are a mughlai specialty taste as unusual as they sound.  I tried it first time in Pind Bhaluchi and that time I decided to make it at home. 🙂 It is quite famous dish in Pind Bhaluchi.  Paneer is used to balance the tanginess of the curd. Traditionally ghee is used for deep-frying kebabs however oil has been used in this recipe. You can mix a few spoons of ghee with the oil to provide a lovely flavour.  Very easy to make and taste is yummmm…. 😉 Spicy masala after deep-frying to add extra zing! 🙂

Preparation Time: 15 mins
Cooking Time: 15 mins
Makes 4 kebabs

Ingredients:

For The Kebabs:
1/2 cup hung curds
5 white bread
1 1/4 cups grated paneer (cottage cheese)
2 tbsp finely chopped coriander (dhania)
2 tsp finely chopped green chillies
1 tsp coriander powder
1 tsp chilli powder
1/2 cup  finely chopped Capsicum
1/2 finely chopped onion
salt to taste
1tsp chat masala
1/4 tsp pepper powder
oil for deep-frying

For Serving:
green chutney
Lemon  and onion rings

Method:
1. Heat a pan, put 1 tsp oil.
Now put onion, capsicum and grated paneer into it. Saute for 1 min.
2. Now sprinkle coriander powder and again saute for 1 min.
3. Take out this mixture in a bowl and add chat masala, chilli flakes, coriander leaves,  amchoor powder, pepper powder and salt. Mix will.
4. Cut out the brown part of the bread,  dip it into the water and squeeze it.
Put this mixture in the middle of the bread and fold it like an envelope.
Make sure both the corner are sealed properly.
5. Heat oil in a wok now deep-fry these kabab or you can shallow fry it till it brown.
6. Take it out on a tissue paper to absorb extra oil and cut it diagonally. Sprinkle some chat masala on it and serve with green chutney and lemon snd onion rings.

Enjoy the tangy and crunchy taste!! 🙂


20140823_101039 20140823_100724

Cheesy Cheddar Schewzan Pull Apart Roll

Cheesy Cheddar Schewzan Pull Apart Roll, now what can I say….You can have it for breakfast, dinner, appetizer or starter or just plain comfort food at any time of the day.I had always wanted to bake a big pull apart roll that does not involve lots of process and here is what I came up with. Its an eggless bread and loaded with flavor.I wanted the bread to be rich in flavor and texture but not exactly dripping with butter. So I replaced the butter with olive oil and the below picture is what is the result of it. It still came out spongy and springy to the touch and we cleared up half of it as soon as it came out of the microwave.

Ingredients:

For the dough

4  cups – All purpose flour  (Maida)
1 Tbsp Instant yeast
1 Tbsp sugar
1 tsp salt
1 ½ cups warm water
2 Tbsp olive oil/butter

For the filling

2 Tbsp butter at room temperature
1 tsp mixed herbs – oregano,basil,rosemary and garlic powder
¼ tsp fresh ground pepper
¼ tsp salt
Cheddar cheese
1 tsp chilli flakes
1 Tbsp fine chopped cilantro/coriander leaves

(Mix all the ingredients given above to prepare the filling.)

Method :

Step 1.
Prove the yeast – add the sugar to 1/2 cup of warm water. Mix well. The water has to be just the right temperature- not too hot because that will kill the yeast not too cool because the yeast won’t prove. Add the yeast and rest covered for 10-15 minutes. The yeast should froth like soapy bubbles. If it doesn’t, throw the mix and start afresh.
Step 2.
In a big bowl, take the flour, chilli flakes and salt. Mix.Once the yeast has bloomed, add it to the flour and knead the dough with the  1 cup of  warm water. It will be sticky and it is meant to be like that.
Step 3.
Add the Olive oil/butter and knead for another 10 minutes.Transfer the dough to an oiled bowl, cover with a kitchen towel and rest for  4 to 5 hours. The dough should double up. The time actually depends on the weather conditions-if very hot, it doubles sooner than the 1 ½ hours. This is the first prove.
Step 4.
Remove from the bowl once the dough is doubled and gently knock out the air.
Roll it out into a  big square or circle as desired of about one inch thickness . Spread  some schewzan sauce and then  the filling generously.Roll the circle  to make a cylinder.
Step 5.
Cut into equal pieces using a pizza-cutter or a knife. Place the cut cylinders into a well greased baking pan.
Cover and let it rise for about 45 minutes.
Step 6.
Now brush it gently with olive oil and place it into microwave for 45 min on grill position till it get golden brown.
Step 7.
Grate  some cheddar cheese on it and
Serve hot with sauce.

🙂 🙂

20140822_200836 20140822_200714 20140822_201148

Focaccia

20140822_202514 20140822_202412
Focaccia is one of the most popular and most ancient of the breads of Italy and is very easy to make.Focaccia is my favourite type of Italian bread. I’s not too hard to make and you can take it in loads of different directions by changing the toppings. I’ve gone for good old garlic and rosemary here but you could try combos like cherry tomatoes and basil or three cheese. Just keep it light and you’ll be onto a winner.Basic focaccia dough requires only five ingredients, flour, water, olive oil, salt, and yeast. A simple focaccia dough lends itself to so many variations that once you master the dough, your options are endless. You can flavor the focaccia dough itself, add a myriad of different seasonal toppings both sweet and savory, create a crisp crusted focaccia that is great for dipping or spreading with creamy toppings, or make a thicker crusted focaccia that is perfect to use for sandwiches or panini. This easy flat bread is also a great option for novice bread bakers as it can be prepared easily and does not require any fancy shaping.

Ingredients:

For the focaccia dough
2  cups – All purpose flour  (Maida)
1 ¼  tsp dry yeast or ½ teaspoon Instant yeast
1 tsp sugar
1 tsp salt
3/4 cup buttermilk (at room temperature)
¼ cup just-warm water
2 Tbsp olive oil

For the topping

2 Tbsp olive oil
1 tsp mixed herbs – oregano,basil,rosemary and garlic powder
¼ tsp fresh ground pepper
¼ tsp salt
One tomato sliced
One capsicum sliced
Cotton cheese thin sliced
Button mushroom thin sliced

Method :

1. Prove the yeast. Add the sugar to ¼ cup of warm water. Mix well. The water has to be just the right temperature- not too hot because that will kill the yeast. Add the yeast and rest covered for 10-15 minutes. The yeast should froth like soapy bubbles. If it doesn’t, throw the mix and start afresh.

2. In a big bowl, take the flour and salt.Mix.Once the yeast has bloomed, add it to the flour and knead the dough with the buttermilk. It will be sticky and it is meant to be like that
Add the Olive oil and knead for another 10 minutes. You will have a soft and manageable dough now.

3. Transfer the dough to an oiled bowl, cover with kitchen towel and rest for 4 to 5 hours. The dough should double up. The time actually depends on the weather conditions-if very hot, it doubles sooner than the 1 ½ hours. This is the first prove.

4. Remove from the bowl once the dough is doubled and gently knock out the air.Roll it out into a square or circle as desired and place on to a greased baking dish. This amount of dough will give two regular sized focaccias.
Cover with kitchen towel taking care that they do not touch the top of the bread. Leave to rise again for about 45 minutes. This is the second prove.

5. Make dimples on the surface of the bread, gently with your fingertip, so that you don’t deflate it. Spread olive oil generously, arrange tomato and capsicum slices, cottage cheese and mushroom slices over the top and sprinkle some salt, black pepper and herb spice mix.

6. Place it into the microwave for 45 min at grill position, till the top browns.

7. Now grate some cheddar cheese on it and serve hot with schewzan sauce.

Enjoy the flavor of Italy… 🙂

20140822_202738

Hot Red Chilli Garlic Chicken

Hot Chilli Garlic Chicken is a mouth-watering Indo Chinese chicken recipe, here fried chicken is cooked in the combination of Indian vegetables and Chinese flavors and turns into delicious and simply irresistible main course dish, which can be also served as a starter.

Preparation Time : 11-15 minutes
Cooking time : 26-30 minutes
Servings : 3

Ingredients:

Ginger- 3 inch (make a paste for marination and finely chopped for gravy)
Garlic- 20 cloves( make a paste for marination and finely chopped for gravy )
Red chilli – 6 to 8  
Capsicum- 1 cut into cubes
Onion- 2 cut into cubes
Tomato sauce- 1 tsp
Spring onions for garnishing

Pepper powder- 1/2 tsp

Oil to deep fry
Soya sauce- 1/2 tsp

Corn flour – 2 tsp dissolved in water
(Soak ginger, garlic and red chilli in 1/2 cup water, vinegar and pinch of salt solution for around 1 hr. Then make a fine paste of red chilli separately with the soaked solution.)

For Marination:
Chicken with bone- 250 gm ( boneless can also be used)
Youghurt -2 tbsp
Red chilli paste- 2 tsp ( as per your taste)
Ginger and Garlic paste- 1 tsp
Soya sauce- 1/4 tsp
Corn flour- 3 tbsp
Black pepper power- 1/2 tsp
Vinegar- 1/2 tsp
Egg- 1
Red colour a pinch of
Salt to taste
Marinate the chicken with the above ingredients and put it into the refrigerator for 2 hr.

Method:
Step 1:
Heat oil in a non-stick pan.  Add the chicken pieces to the hot oil and deep fry on medium heat till golden. Drain and set aside.
Step 2:
Heat another non-stick pan and add 2 tbsps of oil.Heat till the oil reaches smoking point.
Step 3:
Add  finely chopped garlic and ginger and fry till a little burnt. Add  onions and capsicum and toss.
Step 4:
Add salt and crushed  peppers and stir.
In a bowl mix red chilli paste, soya sauce, tomato sauce  with some water. Now add this bowl of sauce and stir for 1 min.
Step 5:
Now add corn flour dissolved in water according to your requirement for the gravy and wait for a boil to come. After that add the fried chicken into it and coat it with all gravy evenly and cook for 3 min on low flame.
Step 6:
 Now off the flame and add spring onion greens and toss.
Serve hot with butter naan.

Enjoy and let me know your feedback! 🙂


20140822_135813 20140822_135941

Veg Paneer Wrap (Paneer Frankie)

20140822_140936

This Indian wrap recipe is perfect for a healthy, vegetarian lunch. Paneer has a beautiful texture when fried, the outside golden brown and the inside warm and soft. Easy-to-make and pleasing to the palate. Use leftover chapattis to make innovative wraps with a crunchy vegetable filling. Much healthier than those made with refined flour (maida), the wraps provide ample nutrients such as protein, calcium, iron and zinc.

Preparation Time: 5 mins
Cooking Time: 5 mins

Ingredients:

For wrap:
1 1/2 cup all purpose Flour

1/2 cup Rice Flour

salt to taste

chilli flakes 1/2 tsp 

1 tsp oil to cook

Warm water to knead:

For Filling:

100gm paneer cut into fingers
1/2 cup chopped green and red bell pepper
1/2 cup Boiled American corn
1/2 cup onion chopped
1 tsp ginger-garlic paste
1/2 cup sprouts
Seasonings ( oregano, rosemary and basil)- 1/2 tsp
1/2 cup julienne carrot
1/2 cup chopped mushroom
1/2 tsp chilli flakes
1 tsp tomato sauce
1/4 tsp soya sauce
1/2 tsp vinegar
1/2 tsp chili sauce
1/2 cup chopped cabbage
1/2 cup chopped  coriander
salt to taste

Method:

Wraps:

1. Mix all purpose Flour with salt and chilli flakes and knead it with warm water and keep aside for 30 min.

2. After 30 min, divided the dough into 4 balls and roll them like a thin chapati.

3.Now heat a tawa, grease it with some oil and cook these roties

Filling:
1. Heat a pan, put some oil into it. Now shallow fry the paneer pieces. Then keep them aside.
2. In the same pan put some more oil.
Then add  ginger-garlic paste, saute it till it turns brown in color. Then add bell peppers,boiled corn, carrot, mushrooms and sprouts,  saute it for 1 min
3. Now add all sauces except vinager.
Mix well. Now add all seasonings, chilli flakes and salt as per your taste. Add fried paneer into it.
4. Toss it well to coat it will with all sauces. Now add cabbage and vinegar.
Now off the flam and keep them aside.

Assembling:

Now in between  the chapati,
Place this filling and top them with chopped onion and coriander.
Now veg paneer wrap is ready to serve.
Serve hot. Enjoy!! 🙂

Italian Creamy Bow tie Pasta Salad with Vegetables

Pasta salad is like the ultimate summer side because it’s versatile with so many different options to change it up. I have discovered a new pasta salad that I like just as much… Creamy Pasta Salad.This is absolutely the BEST creamy salad I have ever had and I loved making it! So much. So, I thought to share this with you all.This simple salad is perfectly creamy, tangy and full of flavor, with a little spicy-sweet kick…. which, if you haven’t had before, are the BOMB.You’ll love this delicious, easy Italian Creamy Bow tie Pasta Salad with vegetables.So here is the simple recipe for  Italian Creamy Bow Tie Pasta Salad with Vegetables.

Preparation Time: 20 mins
For 3 person

Ingredients:

Salad Ingredients:
1 pack  of bow tie or twist pasta
4 cherry tomatoes, halved
1 medium cucumber, seeded and chopped (about 1 cup)
1/2 cup carrot sliced
1/2 cup chopped green or red bell pepper
1/2 cup chopped onion
1 cup cabbage cut into leaves
1/2 cup Boiled American corn

Dressing Ingredients:
1 1/2 cup Salad Dressing ( several salad dressings are available in the market. I bought a fun food veg salad dressing)
1/2 cup mayonnaise
2 teaspoons  plain vinegar
1/2 teaspoon salt, adjust to taste
1/2 teaspoon freshly ground black pepper
Seasonings ( oregano, rosemary and basil)
2 tsp chili flakes
2 tsp olive oil

Preparation:

Cook bow ties according to package directions, just before the pasta are done , add the red and green bell peppers to the pot. Let them boil for about 30 seconds and then drain everything. Set aside and let them cool completely. Rinse well with cold water.

Stir together all the salad dressing ingredients in a large mixing bowl. Add the cooked pasta into the bowl and stir well to coat. Add the cucumber, pepper, and onions  cherry tomatoes, cabbage and carrots and stir again. Sprinkle all the seasonings. Taste and adjust seasonings, if needed. Cover and refrigerate until ready to serve. Stir again just before serving grate some cheddar cheese and serve.

Enjoy and let me know your feedback!! 🙂 🙂

Tips:

1.You can add more vegetables as per your taste.
2.The dressing will thicken up as the pasta salad chills. So before serving just chill it.

20140804_220106 20140804_215809 20140804_215500 20140804_215323